


In this blog entry we focus on the “user setup”. With Synology NAS's flexible user management options, you can create user accounts for individual family members or employees of a company. By creating users, you can set and manage permissions for everyone, such as shared folder access permissions, storage and shared folder quotas, and bandwidth restrictions.
We show you how to easily create and manage a new user in a few steps.

1. Go to your Sysnology NAS main Page and click on the “system control” (Systemsteuerung) icon.

2. Click on the “user” button (Benutzer).

3. Go to the creat buttom and select create “new user” (Neuer Benutzer).

4. Please enter the data of the new user into the appropriate fields.
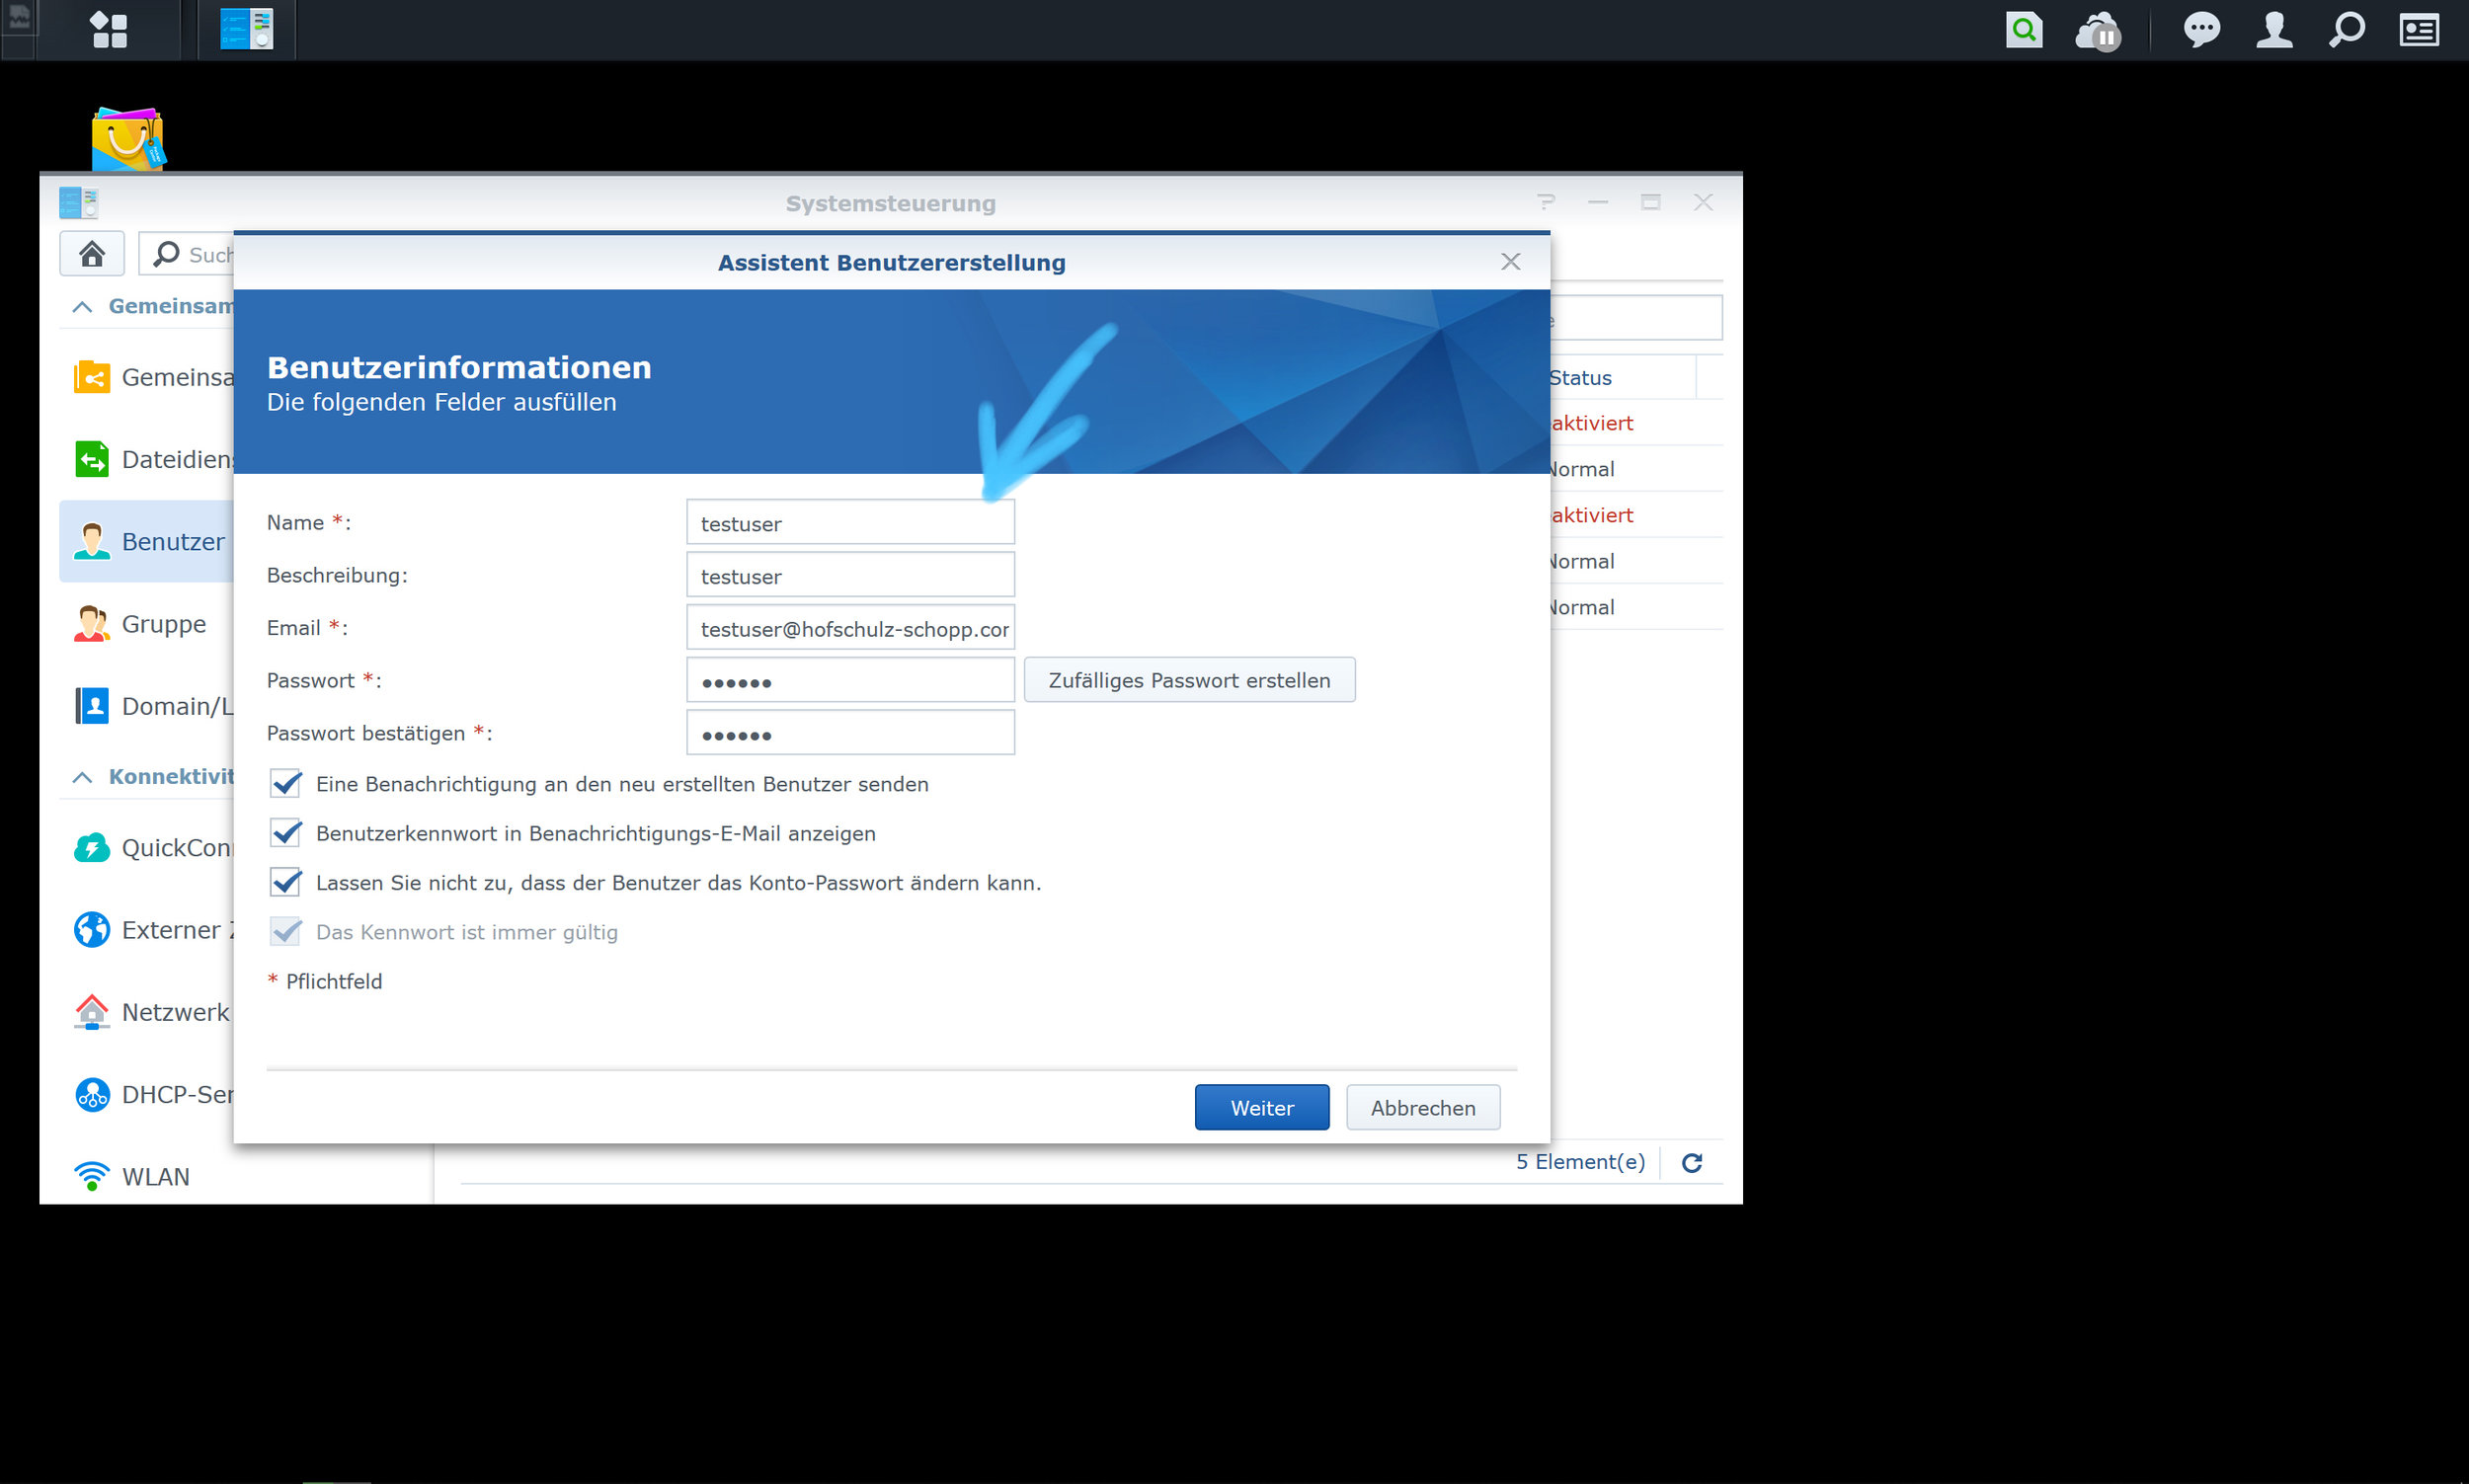
5. Our new username is the “test user”. Please check the entered data and click “NEXT” (Weiter) to continue.

6. Here you can choose and click to which group the new user belongs. In this case we have set up the “new user” is a normal user. Click “NEXT” (Weiter).

7. Now the permissions of the new user are set. In this case and example he only has read and write permissions on the shared folder "HS-data". Then click on the "NEXT" button (Weiter).

8. Now the user contingent will be defined. Here you can set which storage space size is available for the new user (Neuer Benutzer). If the quota is set to 0, there is no limit. After you finished seting up the storage space, please press the “NEXT” button (Weiter).

9. Based on the application overview, the “new user” (neuer Benutzer) must be released the applications he needs. This is just a click in the checkbox. In our case, we will share the calendar with the new user. A release for further applications can take place at any time afterwards. Then press the “NEXT” button (Weiter).

10.In this window you can set up the download and upload speed. In our case we have set the maximum speed. if you finished, please press the “NEXT” button (Weiter).
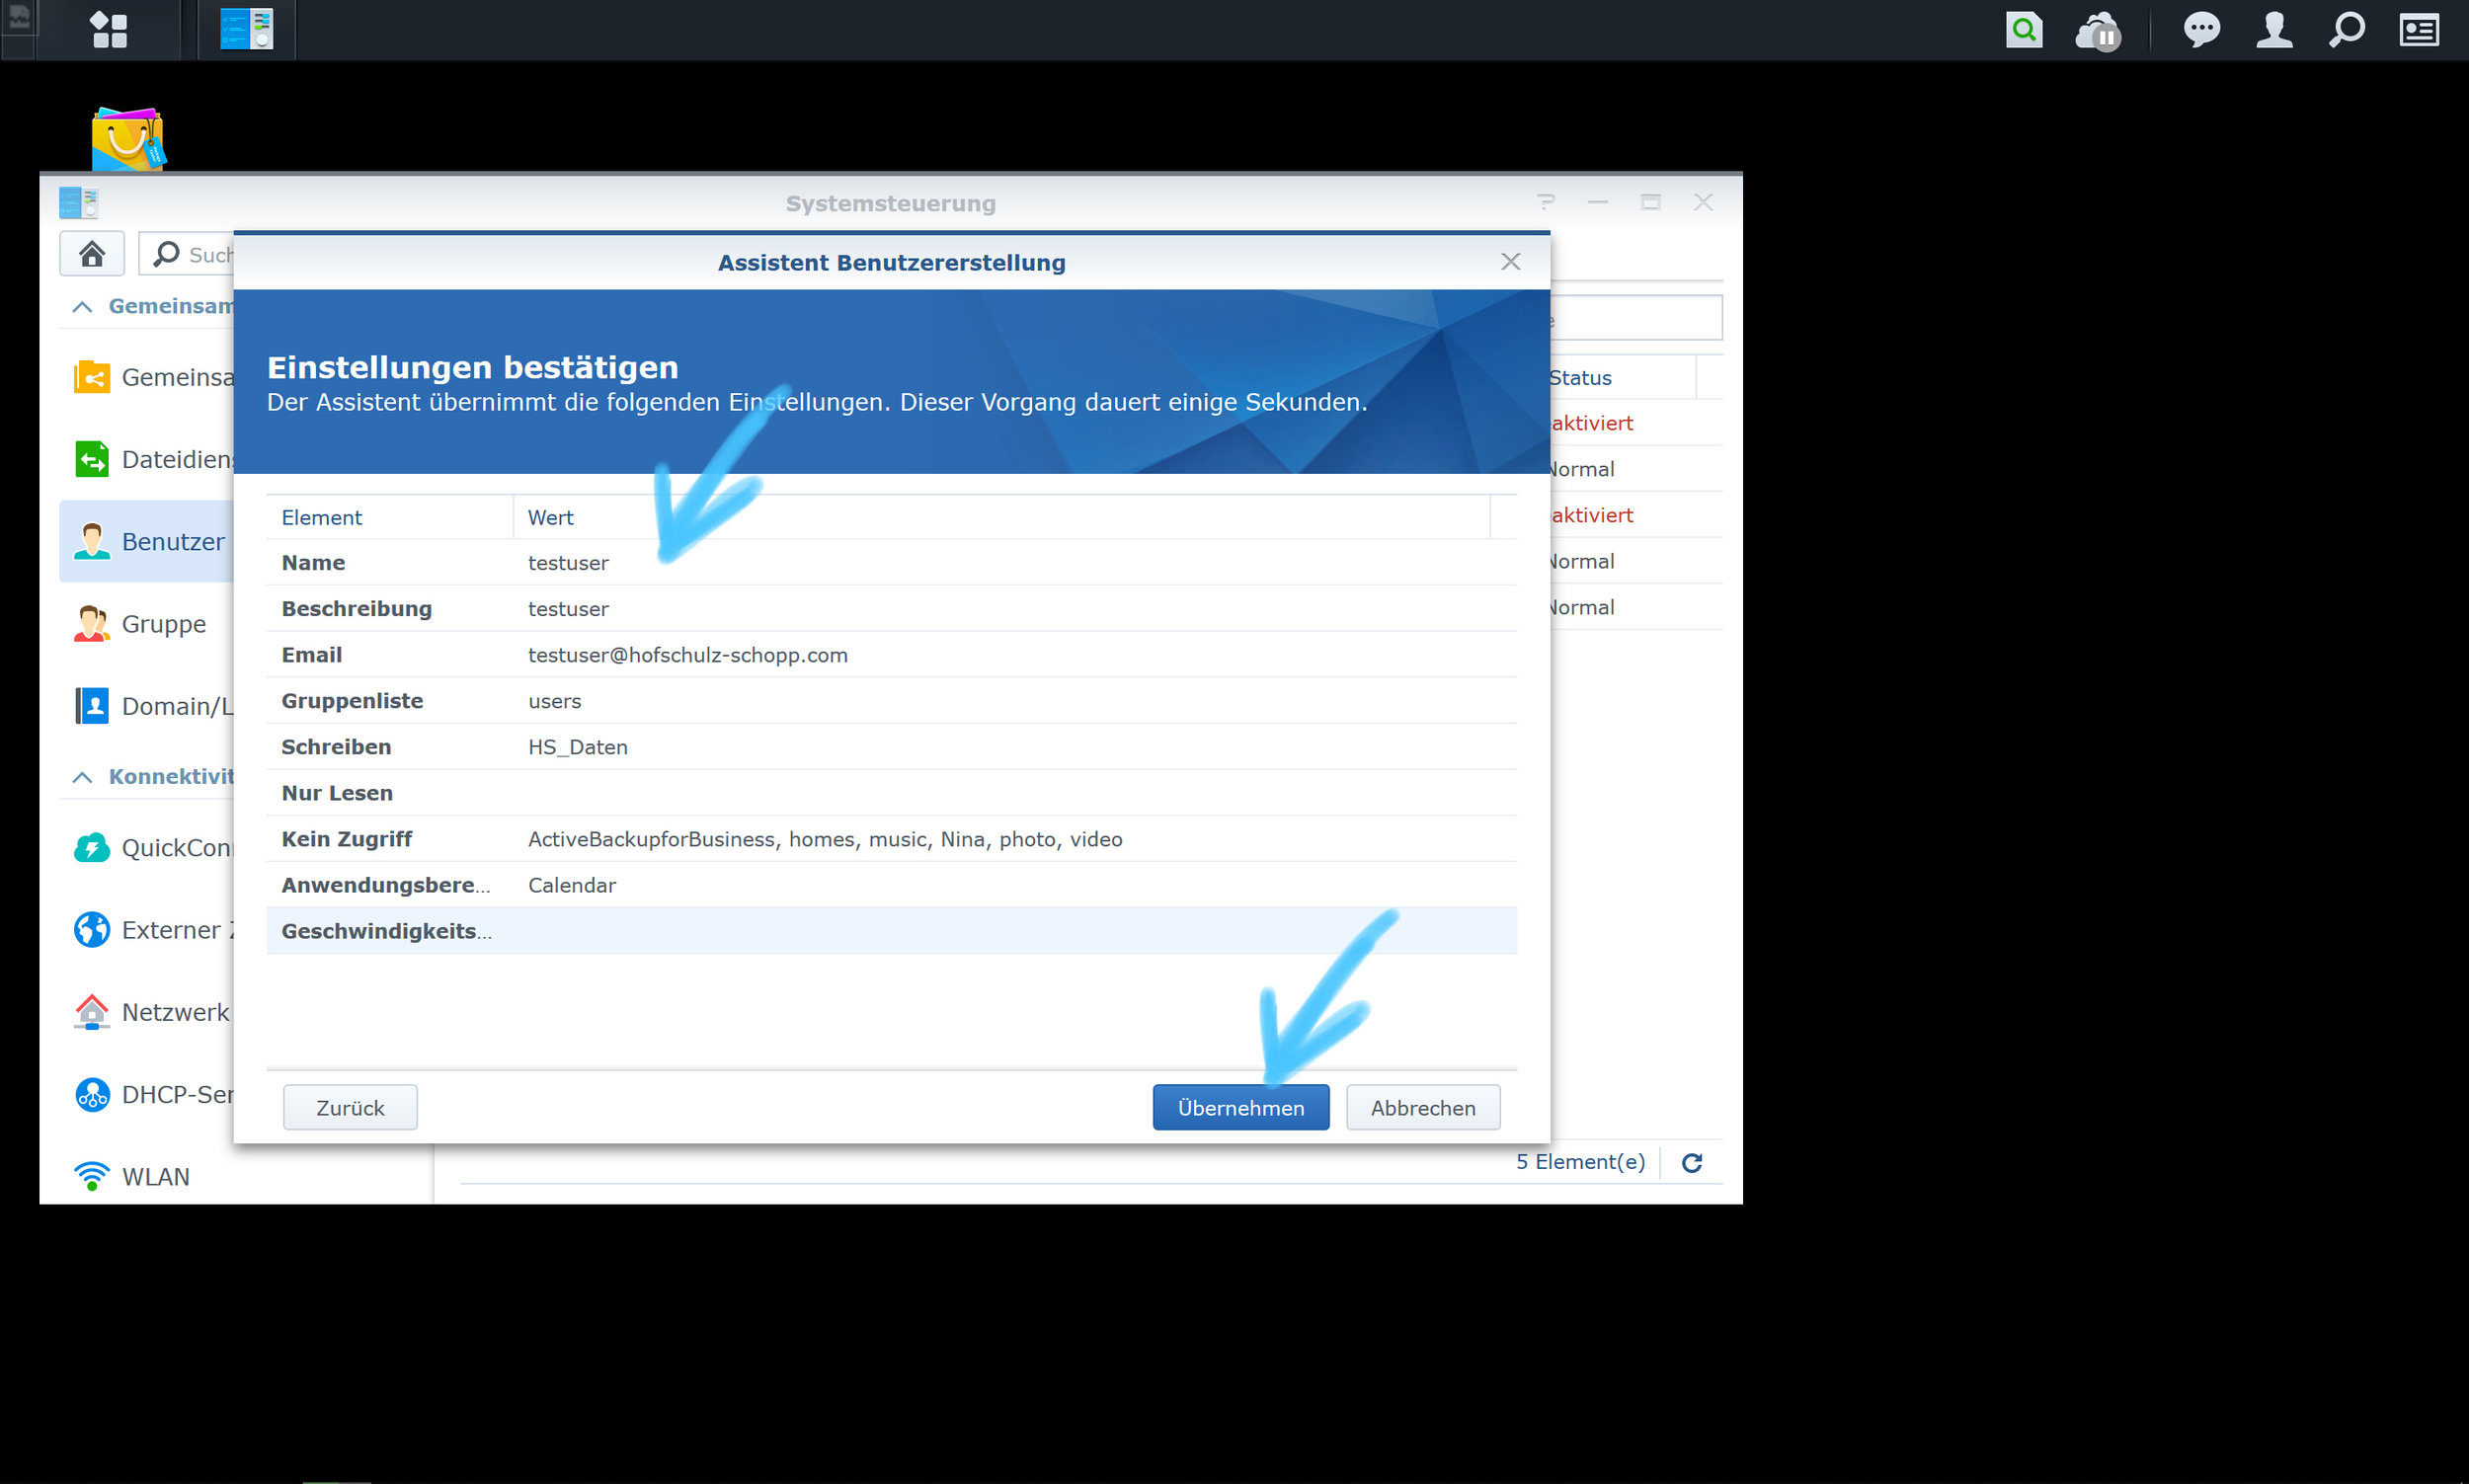
11. The individual parameters of the “new user” (neuer Benutzer) are now displayed. Please check the data again and move the mouse pointer to the apply button to confirm the settings.
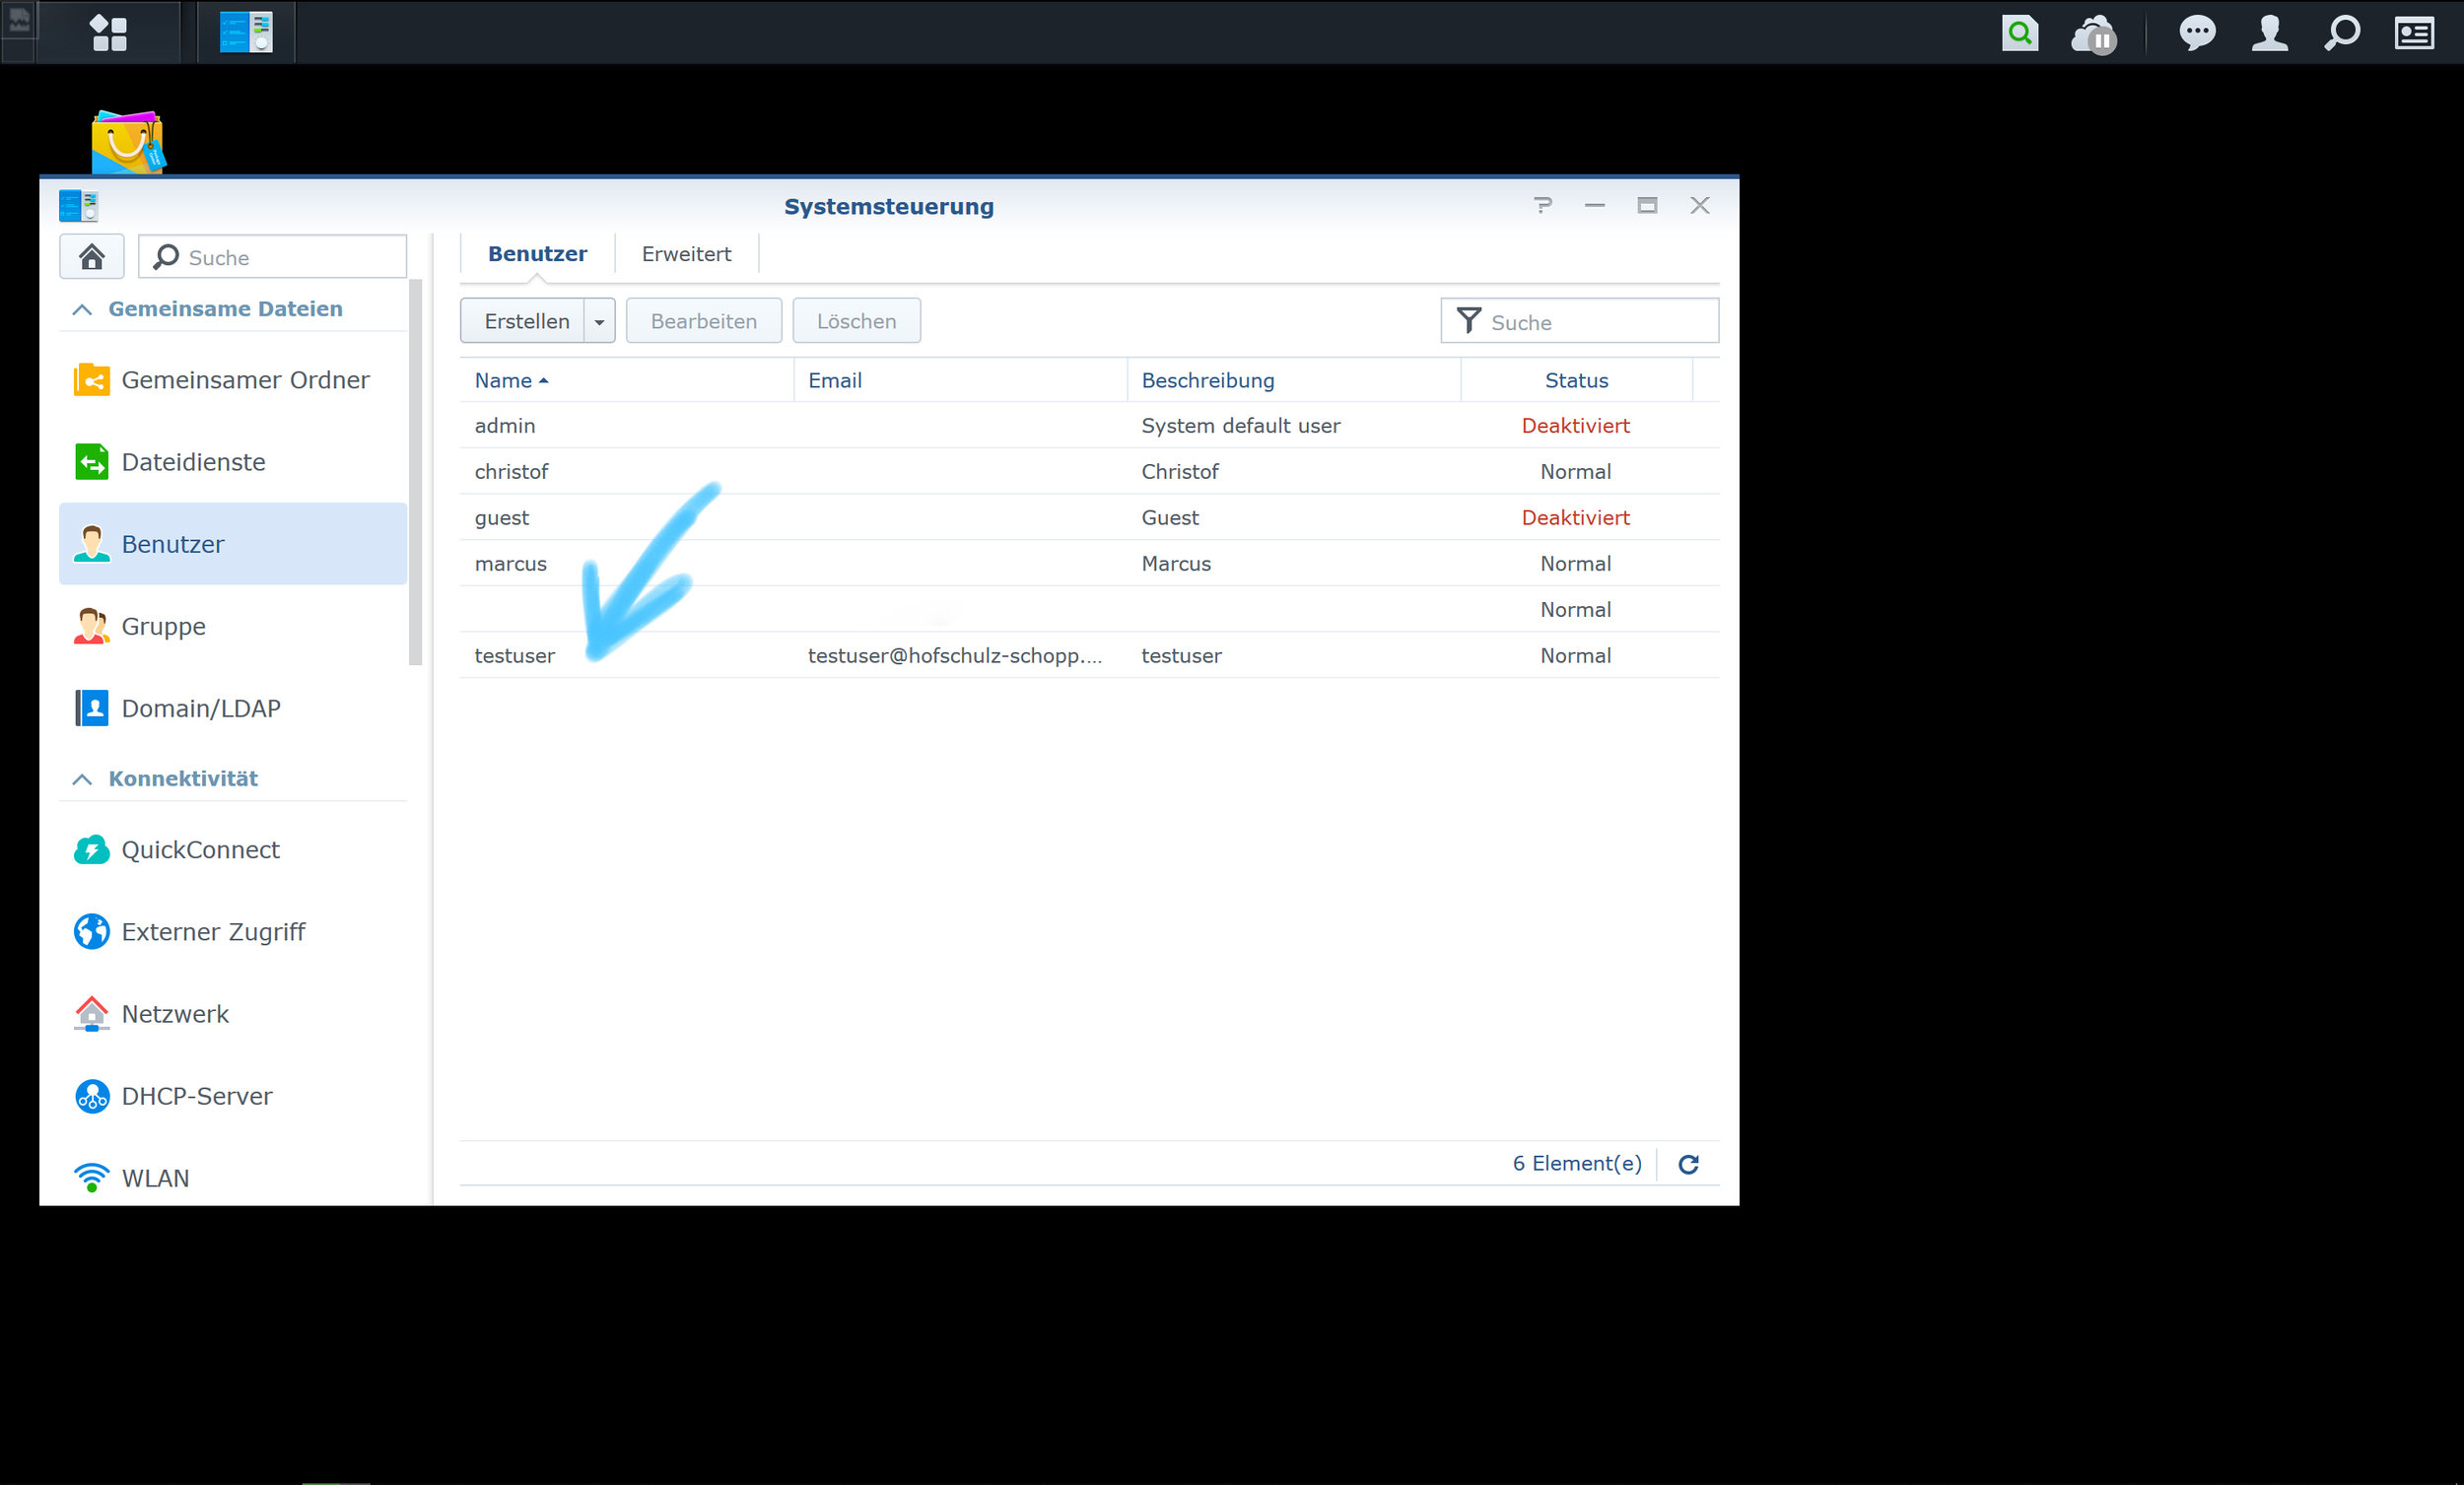
12. In the Control Panel/User you can see the created user. Now the user has access to the Synology. In this case he can work now with our calender.
We’ve created a series of blog posts for Synology.
Click through them if you are interested:
The Synology Knowledge Base is always a great help. You can directly access the Synology support page via the following link
https://www.synology.com/de-de/support
In the next blog we will show you which applications we work with on Synology.
In collaboration with Synology Deutschland and Honds IT GmbH.