


After showing you how to set up a Synology NAS in the first blog we're going to create a shared folder in this one. The shared folder is the basis to work with the Synology NAS. Without a shared folder it is not possible to save files and folders.
Data stored in the shared folders can remain private or be shared with specific users or user groups, depending on the customizable access rights. In addition, shared folders can be encrypted during creation to provide an additional layer of protection.
Here is how you create a shared folder step by step:

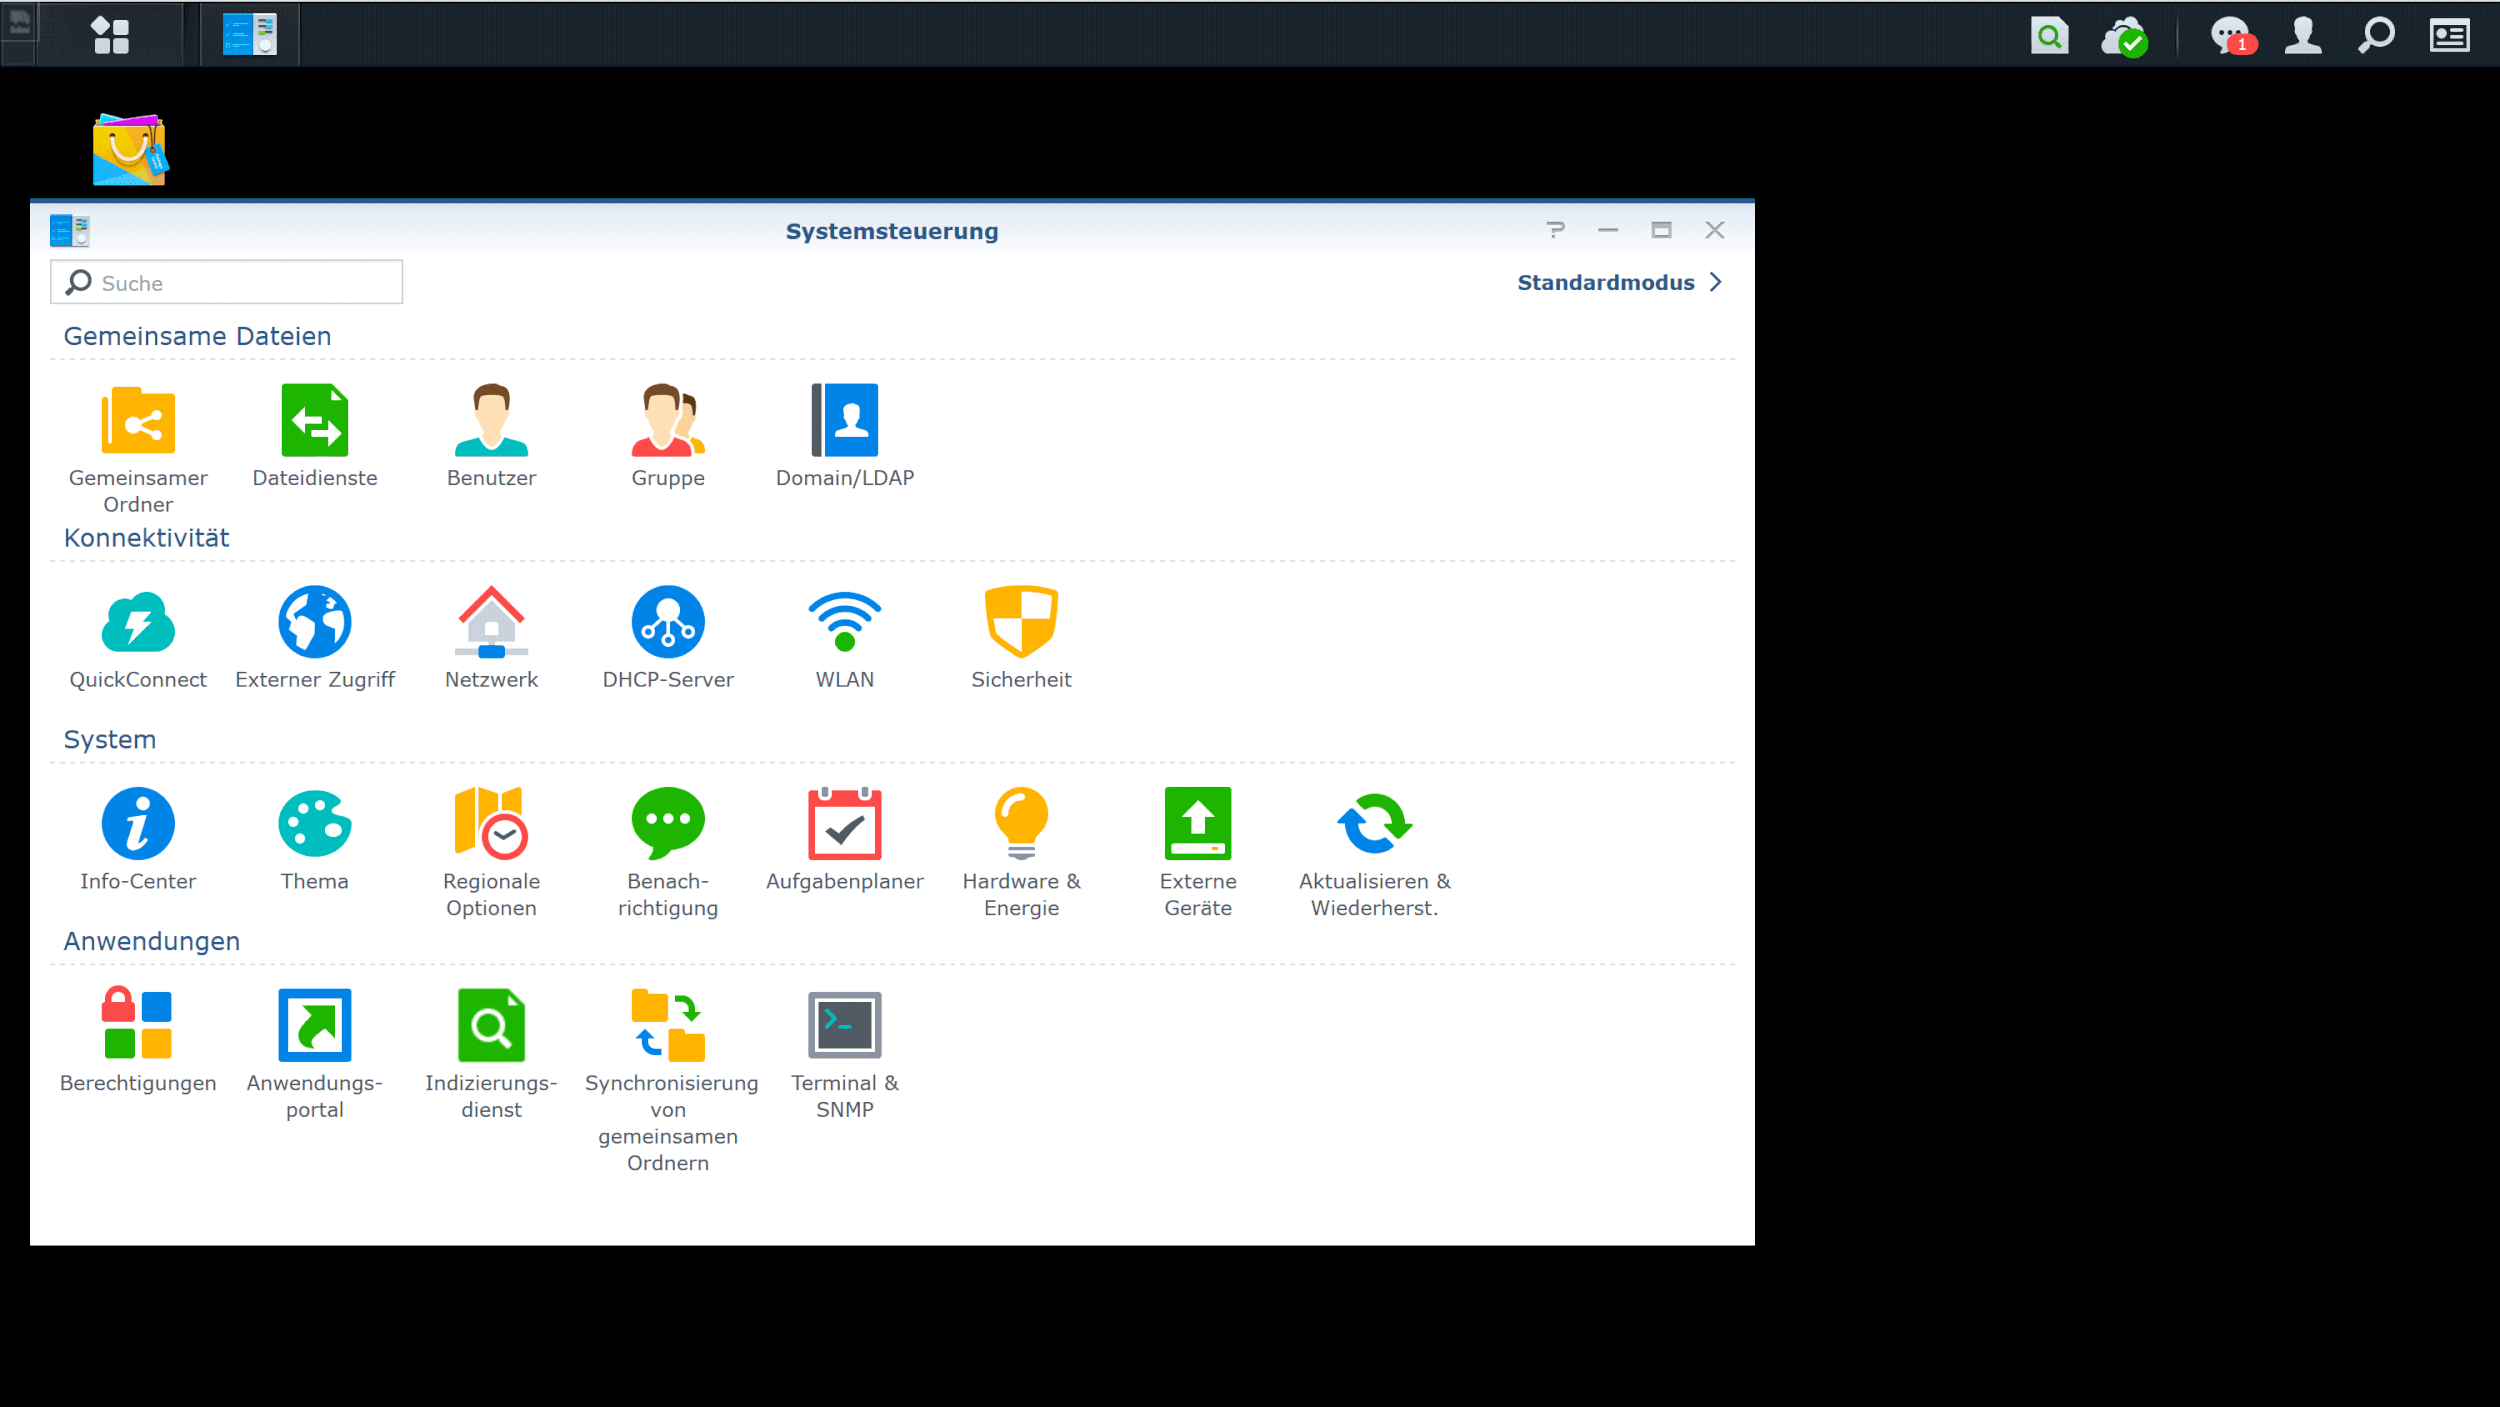
1. click on the “control panel” (Systemsteuerung)
2. Click on the button “shared folder” (Gemeinsamer Ordner)
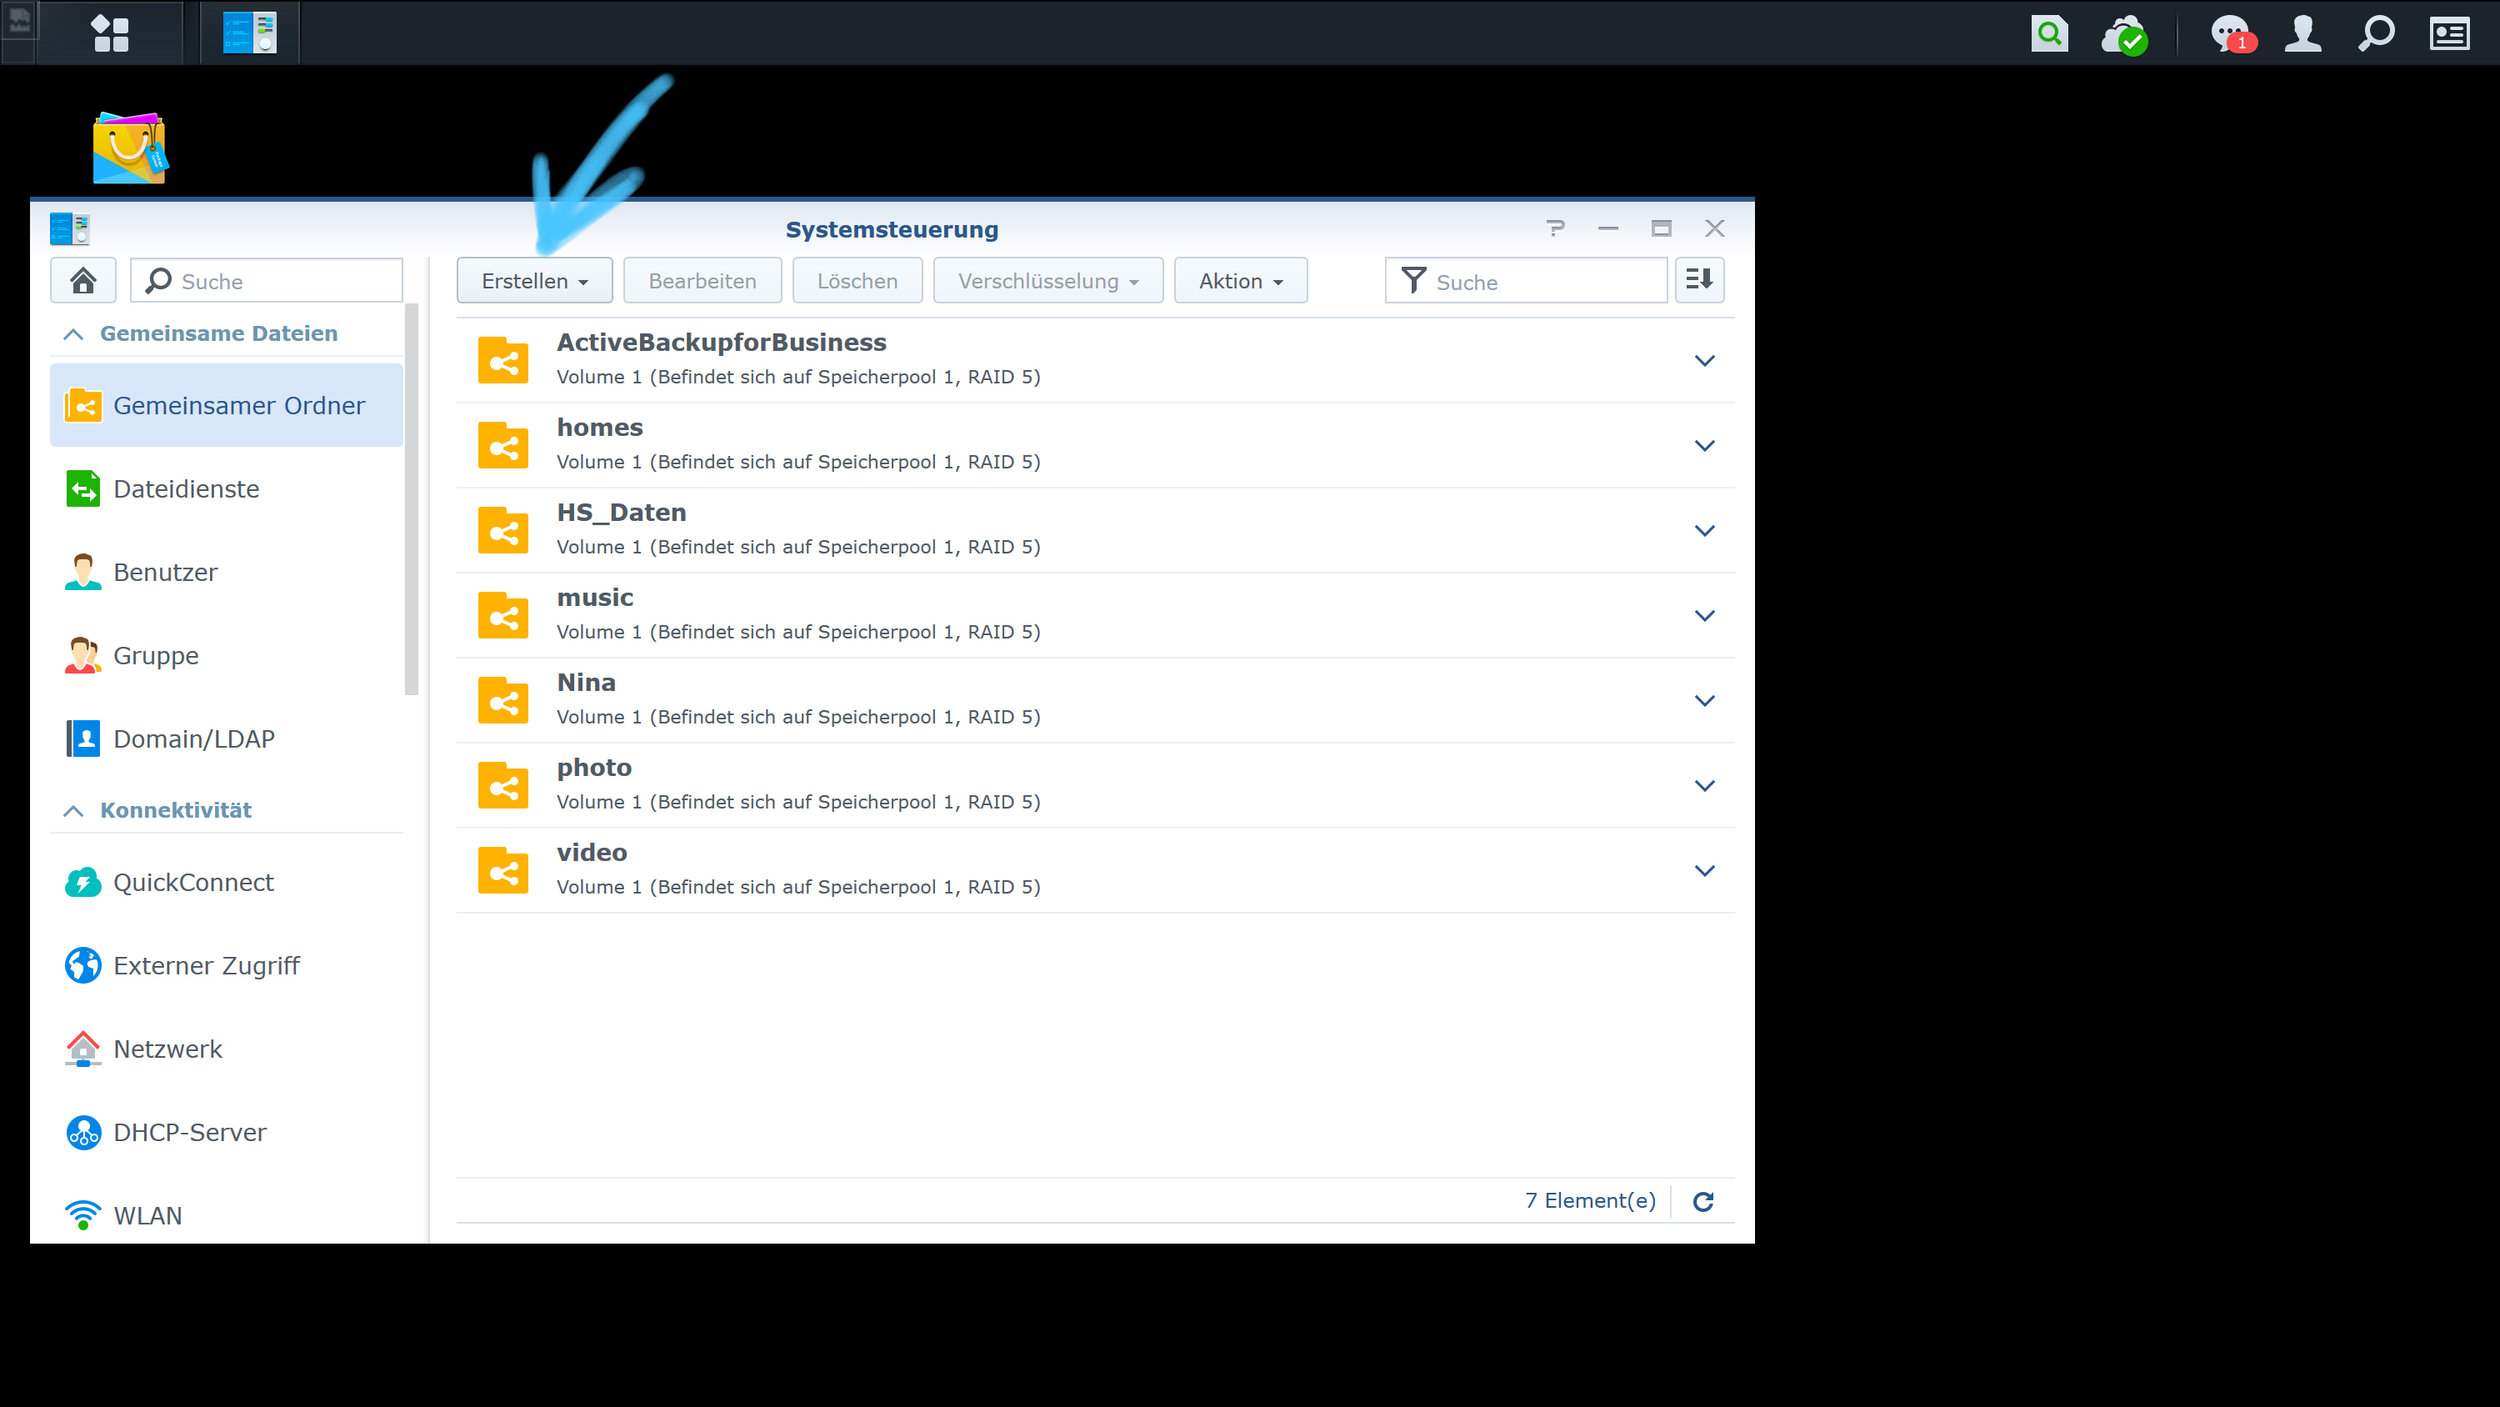
3. Click on the “create” button (Erstellen)

4. Enter the name and description in the displayed fields and press the “next” button. (Weiter)

5. We are now on the encryption side. It's up to you to encrypt the data. Click on the “next” button. (Weiter)

6. On this page you will find the advanced settings. Here you can e.g. define the data quota. Please click on the “next” button (Weiter)

7. Now the settings have to be confirmed. Press the “confirm” button. (Übernehmen)
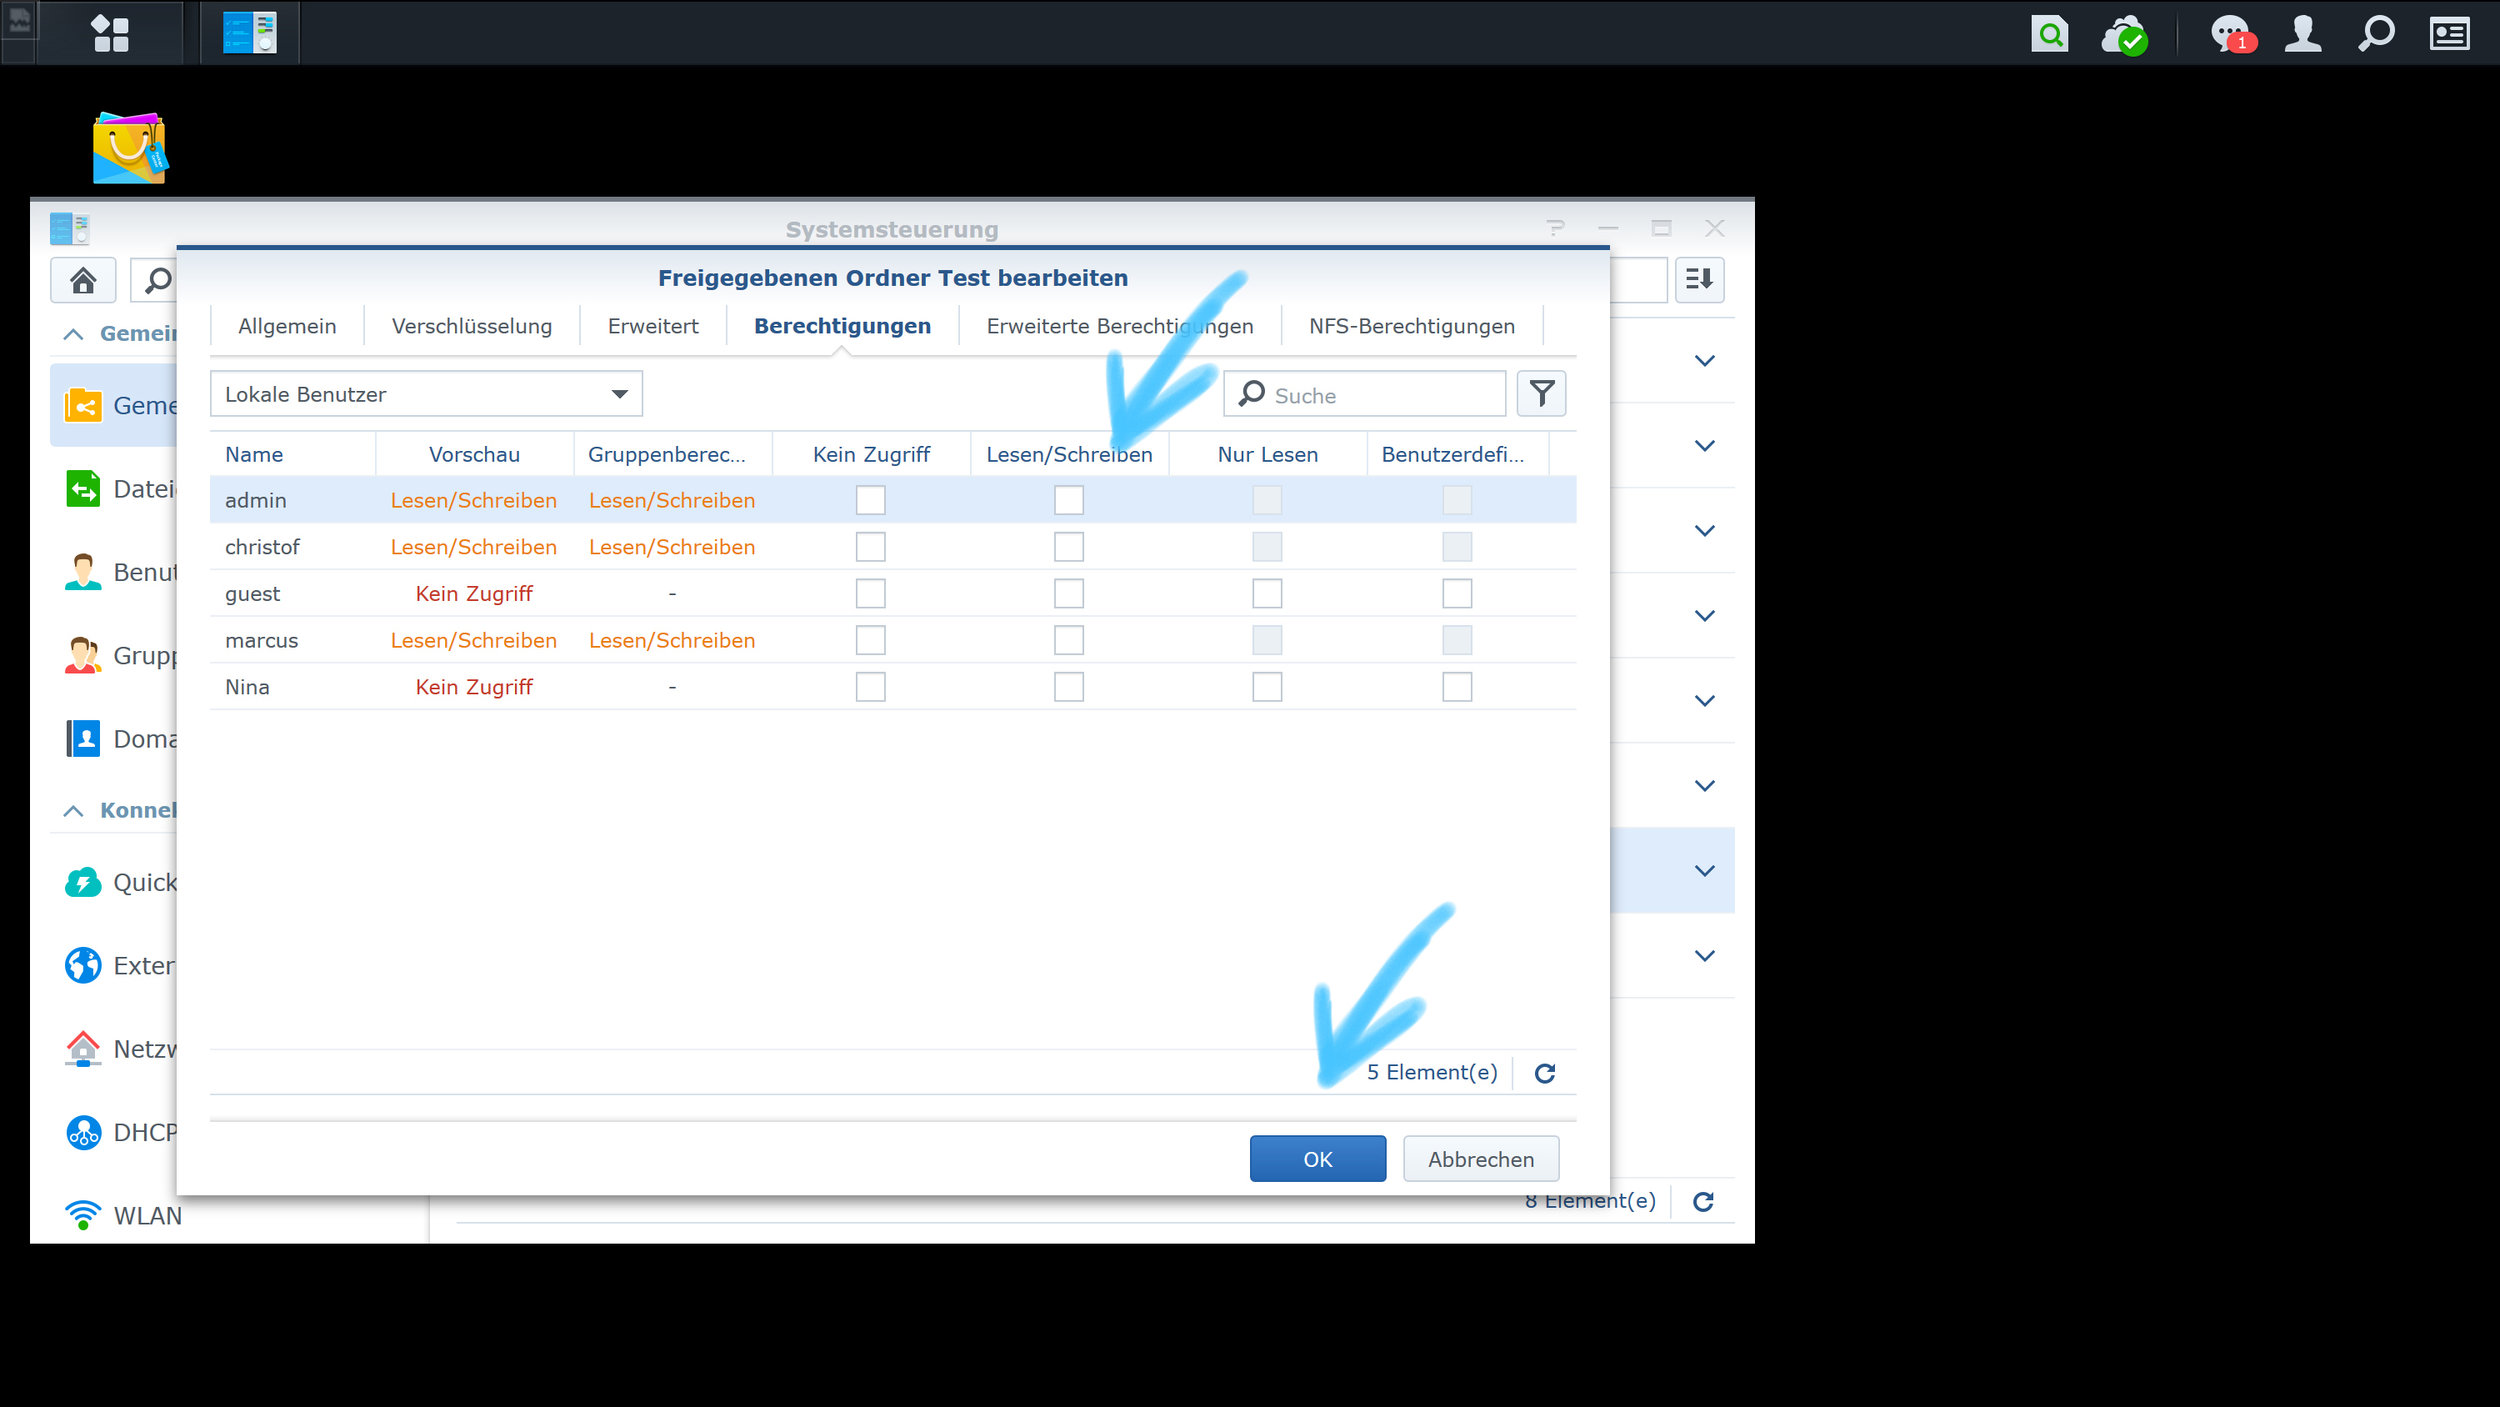
8. Here you can assign the access rights for this folder. After you have chosen the access rights, please press the ”OK” button.

9. After you've confirmed everything, the shared folder can be used. The created “shared folder” is now displayed in the system control panel (Systemsteuerung)
Congratulations, youve created yourself a shared folder! Now you can start working with you NAS.
We’ve created a series of blog posts for Synology.
Click through them if you are interested:
The Synology Knowledge Base is always a great help. You can directly access the Synology support page via the following link
https://www.synology.com/de-de/support
In the next blog entry we will show you how to create a user on your system.
In collaboration with Synology Deutschland and Honds IT GmbH.